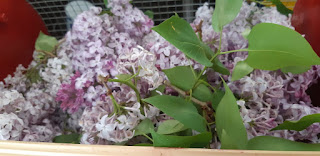
I have always loved when springtime burst open the first flowers of the
season. Yes, my allergies take a beating. I become a leaky, itchy
mess, and in times like these, that can be dangerous.
BUT! Lilacs. The runny nose and eyes are so worth it for
these beautiful blooms! (And the allergies really only last while the
leaves are coming out. So, it's manageable.
The tiny perfect flowers clustered together have such a delicate and
precise appearance to them. Ours even have little yellow centres.
Then there is a scent. Oh my! My whole driveway smells so fragrant
at this time.
The sad part of it all is that like many spring flowers, the blossoms do
not last long. They fall off in a matter of days.
If only there was a way to preserve that first springtime feeling all
year long?
Why not make lilac jelly???!?!?
Jelly...made from lilacs!
How could that be you ask?
Well lilacs are one of the many lesser known edible flowers. There
are many others too. Violets. Dandelions. Clover. Those are some
that I know about anyways.
I will share with you my jelly journey.
Now, I have made lilac jelly 3 times now. And last couple
times. It did not set. So today, I will be boiling again a bit
longer to get the jelly to set. I have made note in the
instructions.
Here is the how to on Lilac Jelly:
1. Pick lilacs. Earlier is probably best. You are
going to want to have enough flowers to fill a 1 L glass mason jar, so have fun
picking. Watch for bees...
I just can't help the pictures!
2. Now that you have a basket full of stems you will need to
remove each individual flower. Remove all green parts. This is a
very time consuming and tedious task. I like to do while watching
TV. Stuff a 1 L jar with the flower. Jam it in there until you
can't seem to stuff anymore in.
3.
Pour boiling water over the flowers. Put lid lightly on jar and leave to
steep overnight. I left mine on the counter, but you can place in the
fridge if your "tea" is cool enough.
4. In the morning, gather your tools to strain your tea. If
you have a jelly bag and stand, that is the best tool. I have a jelly bag
stand (I call it an apparatus), but I never replaced the bag, so I just used a
steamer (you can use a colander), lined with about 3-4 layers of cheese
cloth. Pour your tea with all flowers into the strainer and leave
to drip.
5.
When dripping has almost stopped. (I went out to work in the gardens),
gather cheesecloth so the flowers are in a ball and squeeze the rest of the tea
out.
6.
Pour your tea into a measuring cup to see how much you made. Then add to
a clean pot.
7.
My double batch of tea made 4.5 cups of tea. I added 6 cups of sugar to
the pot (Some online recipes say that you should add all the sugar at once, I
didn't) and the juice of a lemon. The lemon juice made my colour change
to a bright pink!
8. Bring the mixture to a boil over high heat. Cook for
about 1 minute (These are the instructions from the certo package.
9. Have all of your other supplies ready to go. Your jars
should have been scrubbed, rinsed and sterilized. I like to sterilize in
the oven. (225 degrees for 10 minutes). Your lids should be put in a pot
of water. Turn on to get boiling.
10. I used 2 packages of certo and followed the package
instructions for raspberry jelly (but used less sugar because, well 6 cups was
plenty sweet enough. My jelly did not set. It almost did, but not
to the right jelly consistency. You can use a frozen plate to check the
gel while you are making jelly) I have done some research since completing my
jelly. I doubt that lilac flowers have a lot of natural pectin, if any at
all. All other recipes have you cooking the jelly with the certo or
pectin in the mixture. The package insert says to remove from heat.
So, I will be cooking my jelly again with the certo in it until it begins to
gel!
11. Ladle jelly into prepared jars. Wipe rim. Set seal
and close rim finger tight.
Et voilà! Springtime preserved!
****My suggested measurements for a single batch
would be 2 1/4 cups of tea with 3 cups of sugar (taste to make sure you like
the level of sweetness), juice of half a lemon. I would strongly suggest
using the plate method to check for gel. (set plate in freezer when you
first begin. Set a small amount of jelly on the frozen plate. Set
back into freezer for about a minute. Take out and run your finger nail
along jelly. If it ripples and doesn't drip, you have jelly!)
****Tip: When boiling seals, alternate
up-down to keep them from sticking together. ;)


No comments:
Post a Comment
Leave me a comment