Thursday, December 31, 2020

A new year.

 So this is my new year message.  Kinda like the Queens address...only a Diva address. :)

Soon, I will put my final touches onto tidying up my house and then I will start prepping the food for our fun filled evening in, the 4 of us.  

I'm not really bothered by not going out or having others in this year.  Normally our new year's are spent at home.  But it feels almost as though something is missing.  

Tonight we will either play board games or we will watch a movie.  Hopefully "Zoom" with some family/friends...oh the vocabulary of 2020.  

2020.  What can I say about 2020? 

I lived through Y2K.  Not even a scratch from that one!  

This one...I think I have about 15 extra pounds from this one.  

Never did I image I would be living in times such as these.  I don't think I have to say much about our current pandemic.  I think we are all living it.  

But with tonight's activities comes the promise of a new year.  

I don't believe that for a moment the hands of time will reset at 12:01 tomorrow morning...or when I wake up in the morning, because let's be honest...I probably won't make it awake to midnight...age has a way of doing that to us....unless it's just me...

However, not everything has been doom and gloom this year.  

This year I was awarded the opportunity to spend more quality time with my children.  Mr Diva is "essential"  so his role did not change through the pandemic, but the schools were closed and so kids and I were at home. I will not lie and say it was easy peasy...anytime you spend ALL THE TIME together, things have the potential to get messy, but we got to spend quality time together, learning together.  

Our gardens were amazing!  My seedlings got my undivided attention because they were my escape.  In March and April, I would sit in my kitchen among my green babies and imagine I was sitting in the serenity of my gardens.  We also added more square footed growing space in raised beds and extended the in ground garden. I am so looking forward to all that we can grow this upcoming year!  

But I do think I place more value on the lessons that were learned this year.  

1.  This is hard, but WE CAN DO HARD THINGS.  Staying apart from loved ones is so hard.  Online schooling, whether teaching or learning, is hard.  Staying positive in a time of uncertainty and when hearing bad news, is hard.  The "new normal" is hard (I am not looking forward to the upcoming week of virtual learning, but I am excited to be maskless and to get to see my students' faces and them seeing my face), but look how we have persevered!  How creative have we been?  We've had to completely change the way we approach certain situations.  But we did it, because WE CAN DO HARD THINGS! (Personally, I had help from He, who gives me Strength)

2.  Never take for granted the time you have to spend with loved ones.  We used to have dinner with my mom every three weeks, then I would go to church to practice music for Praise team...since March, we have not been.  I miss those dinners.  Many times it was frozen fish fingers and fries, but the kids loved it (I did too) and it was the company that we got to keep that made it that much more special.  I miss this and extended family dinners. Every moment that I am gifted to spent with family and friends, I will never take for granted again...instead I will cherish that time. 

3.  I think the final lesson that I learned is to work on my Faith life.  I have learned to fully trust.  One day, in God's timing, we will have more property and a farm.  I know it will happen.  In the meantime, while I am waiting, I will continue to work on my relationship with God and also in learning more about growing more food and also animal raising.  

As we count down the minutes this evening, I encourage you all to reflect on the lessons that you learned this past year.  

Even if COVID 19 doesn't magically disappear upon the stroke of midnight, you are given a new beginning.  New birth so to speak.  Use every moment that you are given to its full potential.  

Happy New Year Divas!  Many blessings!

Tuesday, December 29, 2020

Creamed veg

 Boring, bland, boiled vegetables getting you down?

Tired of the same old salt and pepper seasoning?  

Why don't you try something new and adventurous?  

Ok maybe not so adventurous, but at least it's something new. 

Creamed Vegetables

For this dish, you really just make a simple sauce and then mix your boiled vegetables into it.  

Note:  Quantities are approximate and will vary depending on how many vegetables you want to cream.  (If you have lots, make lots of sauce, if a little, make a little)  This will be for roughly 2 cups of vegetables. 

1.  Melt roughly 1 Tbsp of butter in a saucepan on medium-low. 

2.  Add roughly 2 Tbsp flour.  This is called a roux. The melted butter will thicken.  Be sure to keep whisking to prevent lumps from forming.  

3.  At this point add about 1/4 - 1/3 cup of milk, whisking constantly.  

4.  Add salt and pepper to taste.  At this point you can also add any other desired herbs or spices, ie. parsley or dill.  

5.  Toss in cooked vegetables to coat in cream sauce and serve. 


Sunday, November 1, 2020

Having a cold during COVID

I knew it was bound to happen. 

School started.  I have a six year old and he doesn't have to wear a mask at school.  He also doesn't understand social distancing.  They are super intelligent.  They can tell you all about it, but they forget easily.  They are kids.  They want to play.  They want relationships.  It is just childlike behaviour. 

This is why colds and flus and gastro bugs move so quickly through primary classes.  

And with fall comes cold and flu season.  

So I wasn't surprised when my 6 year old started coughing through the night that third weekend.  

As a student he was to stay home and self-monitor. 

Then I got it.  

I started coughing day four.  When I started symptoms, I had to stay home.  

I was told to contact our virtual triage to determine if I needed to be tested.  And the response was yes.  

The test for Covid-19 was about as uncomfortable as a throat swab for strep...although in my nose.  It didn't tickle.  It wasn't fun, but it was bearable.  It did cause my nose to run, a lot.  

Then came the wait for the results.  

In total I was home for 10 days under what I called "house arrest".

It was not a vacation, but it was necessary to keep people safe.  

Results came back and confirmed that it was only a cold. 

Colds in COVID times are very different.  The cold itself is the same, but I do feel that I was over the cold much sooner than I would have been regularly.  I was forced to stay home and as a result actually rested and recovered. I know it was "just a cold", and that normally I would have still gone to work with a cough and runny nose, but in these days, we have to be cautious.  

Hopefully, I will not get another cold this year and I pray, that I will not get infected with COVID19.  I pray also that this virus will go away!  And soon!  Christmas will be very different this year.  

Stay healthy!  Keep well! 

Wash your hands and stay home if you are sick.  Life is hard, but we can do hard things. 


Tuesday, October 6, 2020

My love/hate relationship with canning

Some people love canning.  

Other people want to love canning. 

Others don't love canning. 

Then there is me. 

Some would assume I love canning, judging by my Facebook photos through time. 

But between you and me, I don't. 

I mean, I do, but I don't.  

It really is a love/hate thing.  

I love that I can transform things that would rot into yummy pickles and enjoy throughout the Winter.  I love that in January we can savour the taste of an Ontario Peach, picked at perfection. 

I hate how time consuming it is.

I don't have a great setup.  I have a flat top stovetop and a canner that is not flat.  So I use a conduction element and it takes FOREVER to come to boil.  

But I am very thankful that we have canning to help preserve our summer harvests all year long.  (Maybe I will try out my new pressure canner some time soon!


I am still learning, like everyone in this life, and despite canning since high school, I learned some new lessons this year.  

I want to share those things with you all my readers:

1.  Cans should not be stored with rings on.  The rings can force a false seal, leaving the seal down when it wasn't sealed correctly.

2.  You should not stack jars on top of seals.  This can cause your seals to be false seals also. 

3.  You should follow safe tested recipes and instructions to a tee.  (Bernardin and ball and National Center for Home Food Preserves are websites that you can search for safe recipes)

Do you love or hate canning?


Friday, October 2, 2020

Move over "Better than KD"

 A while back I wrote a post on a macaroni and cheese recipe that is easy and oh so yummy.  It is definitely not something you want to eat if you are trying to lose weight...but then it's mac and cheese.  

So...?

I mean...should we expect low fat?  Should we really worry about the fat???  But it did have a BUNCH of butter in the sauce.  BUT IT WAS OH SO YUMMY!  

AND it got a lot of love from the fellow mommies in my son's birth club.  

It was quick.

It was easy. 

It tastes amazing!

But I have found another recipe that may knock the first one off of its pedestal.  

Honestly!

I like to watch "videos on watch" on Facebook while doing the dishes or cooking.  I came across the video below: 


Fast forward to today.  Lu asks me to make KD for lunch.  

I buy two boxes of PC white cheddar mac and cheese when I shop at No Frills.  We ate them the day after. 

So, I had none. 

BUT  I remembered this 3 ingredient mac and cheese and how much I longed to try it.  

Oh my!  Not disappointed! It was so tasty and creamy!


I did make some alterations. 

I cooked the pasta in the milk...only scorching the bottom of the pan once...well entirely. 

So as not to make it tastes smokey (AKA BURNT), I poured all I could salvage into a new clean pan and continued to cook at a lower temperature.  So my advice, from my own experience, lower heat and watch it continuously!

Once the noodles were cooked I added shredded cheese.  We just chose the blocks that were almost done.  Today they were gouda and mozzarella.  (Next time, who knows?)

I added about a teaspoon of CCB from Epicure as I mixed.  (If you are not familiar with Epicure or CCB, you need to become familiar with it.  It is an amazing spice/flavouring blend - I can get you in touch with a sales rep too, just leave a comment below or send me a message and I will tag her on Facebook)

Mix up until all cheese has melted. 

Oh and I added salt and pepper.  Because, well, it's just good!  

Try it out!  It is the ultimate in comfort food!  


Take care, Friends.  

Monday, June 1, 2020

Lilac Jelly!

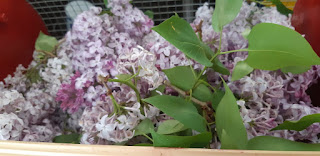
I have always loved when springtime burst open the first flowers of the season.  Yes, my allergies take a beating.  I become a leaky, itchy mess, and in times like these, that can be dangerous.  


BUT!  Lilacs.  The runny nose and eyes are so worth it for these beautiful blooms!  (And the allergies really only last while the leaves are coming out. So, it's manageable.  

The tiny perfect flowers clustered together have such a delicate and precise appearance to them.  Ours even have little yellow centres.  Then there is a scent.  Oh my!  My whole driveway smells so fragrant at this time.  

The sad part of it all is that like many spring flowers, the blossoms do not last long.  They fall off in a matter of days.  


If only there was a way to preserve that first springtime feeling all year long?

Why not make lilac jelly???!?!?


Yes, that is what I said.  Lilac jelly!

Jelly...made from lilacs!

How could that be you ask?  

Well lilacs are one of the many lesser known edible flowers.  There are many others too.  Violets. Dandelions. Clover.  Those are some that I know about anyways.  

I will share with you my jelly journey.  

Now, I have made lilac jelly 3 times now.  And last couple times.  It did not set.  So today, I will be boiling again a bit longer to get the jelly to set.  I have made note in the instructions. 

Here is the how to on Lilac Jelly:  

1.  Pick lilacs.  Earlier is probably best.  You are going to want to have enough flowers to fill a 1 L glass mason jar, so have fun picking.  Watch for bees...


 I just can't help the pictures! 

2.  Now that you have a basket full of stems you will need to remove each individual flower.  Remove all green parts.  This is a very time consuming and tedious task.  I like to do while watching TV.  Stuff a 1 L jar with the flower.  Jam it in there until you can't seem to stuff anymore in.  


3.  Pour boiling water over the flowers.  Put lid lightly on jar and leave to steep overnight.  I left mine on the counter, but you can place in the fridge if your "tea" is cool enough.  


4.  In the morning, gather your tools to strain your tea.  If you have a jelly bag and stand, that is the best tool.  I have a jelly bag stand (I call it an apparatus), but I never replaced the bag, so I just used a steamer (you can use a colander), lined with about 3-4 layers of cheese cloth.   Pour your tea with all flowers into the strainer and leave to drip. 


5.  When dripping has almost stopped.  (I went out to work in the gardens), gather cheesecloth so the flowers are in a ball and squeeze the rest of the tea out.  

6.  Pour your tea into a measuring cup to see how much you made.  Then add to a clean pot.  

7.  My double batch of tea made 4.5 cups of tea.  I added 6 cups of sugar to the pot (Some online recipes say that you should add all the sugar at once, I didn't) and the juice of a lemon.  The lemon juice made my colour change to a bright pink!


8.  Bring the mixture to a boil over high heat.  Cook for about 1 minute (These are the instructions from the certo package.  


9.  Have all of your other supplies ready to go.  Your jars should have been scrubbed, rinsed and sterilized.  I like to sterilize in the oven. (225 degrees for 10 minutes).  Your lids should be put in a pot of water.  Turn on to get boiling.  

10.  I used 2 packages of certo and followed the package instructions for raspberry jelly (but used less sugar because, well 6 cups was plenty sweet enough.  My jelly did not set.  It almost did, but not to the right jelly consistency.  You can use a frozen plate to check the gel while you are making jelly) I have done some research since completing my jelly.  I doubt that lilac flowers have a lot of natural pectin, if any at all.  All other recipes have you cooking the jelly with the certo or pectin in the mixture.  The package insert says to remove from heat.  So, I will be cooking my jelly again with the certo in it until it begins to gel!  

11.  Ladle jelly into prepared jars.  Wipe rim.  Set seal and close rim finger tight. 

Et voilà! Springtime preserved!


****My suggested measurements for a single batch would be 2 1/4 cups of tea with 3 cups of sugar (taste to make sure you like the level of sweetness), juice of half a lemon.  I would strongly suggest using the plate method to check for gel.  (set plate in freezer when you first begin.  Set a small amount of jelly on the frozen plate.  Set back into freezer for about a minute.  Take out and run your finger nail along jelly.  If it ripples and doesn't drip, you have jelly!)


****Tip:  When boiling seals, alternate up-down to keep them from sticking together.  ;)

Tuesday, May 26, 2020

Mary, Mary, quite contrary. How does your garden grow?

I had plans to write posts before seeds went into the ground, but alas, life while socially distancing got busy and took off on me. 

I wish I could report that the extra time spent at home meant that my home was decluttered, organized and spotless. 

That is not the case. 

Spending more time at home, all the time, translates into more messes.

So that will be something I will need to work on soon! 

I did lose track of my gardening posts too. 

I will continue my posts on veggies and share what I do know, but for now...how is it going?

I wanted to write to just say how proud I am of all of those new gardeners out there!  You will love eating food that you grew yourself.  (Tonight, we are actually eating our own asparagus...there isn't much, but it will still be yummy!)

You are likely to hit hurdles. 

You can't control the weather. 

Weather is a variable that will affect your yield. 

Be easy on yourself. 

All of my potatoes died this year because I put them out too early.  And I am an experienced gardener. 

You are doing a great job! 

Keep going.  (And keep growing)

And learn, learn, learn.  You can ask me if you have any questions.  I would be happy to help. 

So how is your garden growing?

May 16.

Green..or yellow? cleaning...

I have been meaning to add to this blog since the new year.  I have been taking pictures to add to posts, and well, life is getting away with me.  There is always so much to do!

After Christmas, we did an overdue clean out of the fridge.  We had been collecting citrus fruits...and not eating citrus fruits. (No worries, we are not suffering from scurvy).  These citrus fruits were nearing the end of their lives so I decided I would dry them to use in simmering pots or in teas or share with the birds.  So I layered them along the trays of the dehydrator and let them dry.

Before I did so, however, I figured a cleaning would be necessary.

I stopped using commercial cleaners (aside from dish soap) a couple of years ago and strive to use essential oils whenever I can.  I know there is still some controversy on essential oils.  Either people love them, or people love to hate them...and there are the skeptical.  The way I look at it is we were meant to survive on this planet with the things that are on this planet.  Essential oils are concentrated things from this planet...so much closer to the earth than a scientific concoction of chemicals...anyways, that is up to you to decide.


It's no secret.  I use doTerra.  (I love my doTerra oils and if you want to love them too and need help getting set up, I can help you with that...alright enough of a "business type plug") You can use whatever brand you are in love with, but do note the quality of the oil.  Some are diluted.  The companies do not need to tell you this and they can still say that they are pure, even 100% pure...so please do some research, especially if you plan on using them on your body, in your body or on your food!  Safety is important!

I digress.

To clean my fruit I filled a bowl of water so that the fruit was covered.  Then I added 5 drops of lemon oil and let sit for a minimum of 5 minutes.  After time was up, I rinsed and wiped with a cloth.  Nice and clean.

Try it out!

(It also makes your house smelling fresh and clean!)

After the fruit was nice and clean, I sliced and layered in the dehydrator to preserve. 


Tuesday, April 21, 2020

Starting seeds

With our current life circumstances I am seeing many people wanting to grow gardens.  And with growing gardens I am seeing many people starting seeds.

Starting seeds is so fun!  I love it.

I told myself I wasn't going to this year.

I was working full time.

I wouldn't have the time.

Then...

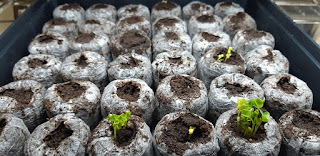
I picked up a seed starter tray...and well...it just opened the floodgates.


I do not have as many starts as I've had in the past, but, I do have more than I will likely need.

Of course I do.

Because that is what us seed starters do...we start too many seeds at once.  Then...eventually...we end up with too little space.  But that is besides the point today.

I wanted to take some time to talk about starting seeds.

It is uber exciting.


I love that feeling of excitement as new little wee sprouts first poke out of the starter.  Then they need that first transplant because they have outgrown their original container...

sigh.

If you have never experienced this, you should try it sometime.

But I do have a few words of caution.

We are finding ourselves in a pandemic.  Unless you've been hiding under a rock for the last three weeks, you are aware of this.  A synonym for pandemic for some means panic.

Don't get me wrong!  I am so excited for the new gardeners.  Those who are worried about our food futures and are deciding to grow their own food.  I am so proud of you.  I am so excited.  Growing your own food is amazing.  I have said many times, food from your own dirt is just a million times better.  (Don't look for that exact quote, but that is how I feel)  It tastes much better and lasts longer...truly!

Now I kinda digress.  My advice...that was where I was going.

So many are excited about growing gardens and starting seeds.

But slow down for a minute!


I have seen many who were starting EVERYTHING that you might EVER grow in a garden. (I started this post back in March)

Please take note of my following three points:

Number 1:  Not all plants do well when started early and transplanted.  Some are much better sown directly into the ground once it is warm enough to do so.

Number 2:  I originally posted these to my Facebook and the date as changed but IT IS ONLY APRIL 3rd! (Life got busy and I didn't get to editing until much later than April 3rd...now, on April 21st, you won't have as long to wait!)  Do some research.  Check to see what growing zone you are in.  This zone is based on your usual climate and how long your usual growing season is.  This is important because you need to know when your last expected frost is.  Here where I live, our last expected frost is around May 20.  That is 6.5 weeks away.  Some plants will die if started this early.  Some plants should not be placed outdoors until 2 weeks after the last expected frost date.  Frosts may kill plants if placed outdoors too early and for others that grow too quickly, the plants may break during transplant, or go into shock due to undue stress on roots.


Number 3:  Some plants will need a lot of space as they get bigger.  You may have to pot up as the plants get larger.  So you need to consider if you will have the space to devote to these plants.


So what can you do 6.5 weeks before the last frost.

Well there are plants that you could start.  Check online for a seed starting calendar and start keeping a journal.

You can grow greens indoors.  You can start them in a new pot every 1-2 weeks and enjoy baby greens in no time and over a long time.


You can start sprouts in a glass jar.  I have a sprout starter that I use, but the instructions for in a jar can be found easily online.


You can start your tomatoes, and you can start peppers still (Maybe not hot peppers as they take a bit longer).  You can plan out your gardening space and gather supplies. 

You can dream about harvests and green beauties as far as your eye can see. 

Happy gardening! 

Wednesday, March 25, 2020

Zucchini

I want to write about the various vegetables that you could plant in your garden, based on my experience and what I have learned over the years of growing them.  Remember I am not an expert, but I love to learn new things.  Most things I love to learn through research but also from doing. 

I had planned to write on another topic first, but today is my birthday and I am social distancing, so I decided that I would write about my favourite vegetable! 

The next posts will be in better sequence...promise. 

So I truly believe that zucchini should be common currency!  I have said this before...and people laugh, but there is just so much you can do with it. 

And it grows well once established. 

One of my friends asked how many plants she should plant for her family, so I found a list on the blog: "newlifeonahomestead.com". 

On this blog, the writer recommends about 10 plants per family.  I have only ever planted a maximum of 4 plants and we've always had more than enough.  And we eat quite a bit of zucchini.  A couple of years ago, we had so much zucchini that I was adding it to many different recipes.  Lu asked me one night "Mom, do  you have to put zucchini in EVERYTHING?"

Zucchini likes moderate water and requires very little effort to produce fruit. 

I have discovered that they do not really like to be grown in pots. 

They are susceptible to blossom end rot, which causes the end of the fruit to rot during production.  The solution to this issue is to feed calcium.  I crush up washed egg shells. 

Another common issue with zucchini is fungus growth on the leaves.  This usually happens if leaves are left wet during the cooler parts of the day.  It is best to therefore, water zucchini in the morning with a sprinkler or only apply water to the ground around it, leaving the leaves dry. 

Another thing to know is that zucchini produces both male and female blossoms.  The female blossoms produce the fruit.  If you find you are not getting fruit, check your blossoms.  if they are all male, the plant will not produce fruit.  If you have both, use a paint brush to move pollen from the male blossoms to the female blossoms and a baby will happen!  (I know feels a little wrong...but sometimes...)  You can eat the male blossoms.  I have never tried them, but I think you pan fry them...maybe battered. 

The way I love zucchini most is grilled on the barbecue with soya sauce and spice.  It is so yummy! 

I hope you can fall in love with zucchini just like me...it's pretty amazing on pizza too! 

One of my favourite sayings is:  "Give a man a fish and he eats for the day, teach a woman to garden and the whole neighbourhood gets zucchini."...source unknown. 


Tuesday, March 24, 2020

I want to start a garden, but where do I begin?

So you are hooked.  

You want to start a garden.  

Maybe you've been gardening your whole life.

Maybe you've been trying to garden, but you don't yet feel successful.  

Maybe you have never gardened before. 

Maybe you have a brown thumb that kills everything you touch.  

If you feel any of the 4 "maybes"  I'd love you here to chat and learn together.  

I will be speaking less to the seasoned gardener, and more to the learning gardener.  But I think we can all agree that at any stage of experience we can all learn more.  And it's fun to learn new things.  

Ok.  Let's get started...

Where do I begin?  

Knowledge is key.  I like to collect books.  😊😊 Yes, I do.  Not ashamed.  I just ordered a new book for my birthday.  I am excited to get it!  (I got this book, in case you are wondering:  https://melissaknorris.com/familygardenplan/)

In addition to looking into books (and I will dig out my books and share some of what I have here in the coming weeks (seeing as I have the time)...there are many online resources that you can look to for more knowledge.  

- Me. ha ha 

- Some of my favourite gardening Youtubers:  Roots and Refuge Farms and Sustainable Stace.  There are more too.  Many of these youtubers have great instructional videos on growing your own food. 

- Books.  This morning for our freeschooling reading time I chose to read this book. I read all about blueberries, because my goal this year is to add some berries to our "food forest" 


Now, get started. 

Next step is to decide what you will plant.  (More to come on this, but for now we'll keep things basic).  Some things need to be started indoors or purchased as seedlings.  And this also changes based on where you live.  I live in Canada.  There is still snow on the ground.  More than I'd like.  It also snowed yesterday...apparently Mother Nature missed the memo that it is Spring time...

So, back to what I was saying, some plants need to be started ahead of time.  These are usually your tropical type plants:  Tomatoes, peppers to name two. 

If you are interested in starting those, you can send me a private message and I can explain that process with you.  Peppers should really be started mid February and tomatoes mid March. 

So if you've missed the starting opportunity, then you can buy some seedlings from your local greenhouse.  They are still considered essential services in Ontario!  (Don't go out to browse though!  Keep your distance friends, let's play safe!)

Seeds:  Most grocery stores sell.  I pulled out some examples from my hoard:  In Canada we have some major seed companies:  OSC (Might be Ontario only), Mackenzie and Burpee.  You also get the Home Hardware Brand (I think it's home gardener), you can even get seeds from the dollar store! 

So pick some seeds that you would like to grow.  I will try to update with what I know of different vegetables in future posts. 

I also have seeds from local seed savers and my own scarlet runners. 


Review:  Step 1:  Start learning.  Step 2:  Get seeds

Step 3:  Decided where you will plant the seeds.  Maybe you want to do an in ground garden.  That is all good.  You would either need to till an area, or you can follow the no til method (create a barrier then build up with soil and compost).  Another option is container gardening or raised beds.  These two options are what I would recommend for a new gardener.  You can grow all kinds of food in containers (any food safe container that you can get your hands on), fill with soil and plant your seeds.  No need to break the earth. If you place your plant in an area that is too shady, just pick up and move it.  

Raised beds are also great options.  Place a barrier down and drop in soil.  Good way to start without having to worry about a million weeds.  

Our first garden was a tilled garden.  There were so many weeds.  I am still weeding, although things are getting better.  

Step 4:  Start planting. 


I know it can all feel overwhelming.  It may feel like so much work.  And it is.  It is a learning curve.  You may experience great success.  You may experience failure.  But you will never experience anything if you don't take the first step to try in the first place.  

When you taste that first leafy green or fruit, grown by you, on your own land, you will be so happy you tried.  

And please do not hesitate to ask me questions.  I want to be here for you along the journey.  

We're all in this together!